Hardware
Create Your Own Personal Cloud Storage At Home And Regain Control Over Your Data

Creating your own cloud storage solution can liberate you from the constraints of commercial services, providing customization, privacy, and cost-effectiveness. Imagine having your cherished family photos, vital work documents, and favorite media files all in one secure place, accessible anywhere and anytime. This guide delves into how you can successfully set up a personal cloud storage system at home, using a blend of suitable hardware and robust software.
Benefits of DIY Cloud Storage
Investing in your own cloud storage system presents numerous advantages:
– Cost Efficiency: With a DIY approach, you can bypass perpetual subscription fees associated with commercial cloud services, leading to long-term savings.
– Complete Control: Self-hosting allows you to maintain full control over your data, ensuring that files aren’t stored on external servers where privacy could be compromised.
– Tailored Solutions: You can build a system that is precisely aligned with your needs—whether for massive data backups, seamless media streaming, or collaborative file sharing.
Setting up personal cloud storage aligns well with a variety of requirements, enhancing the way you manage and access digital content.
Choosing the Right Hardware
The foundation of your personal cloud system lies in the right hardware selections:
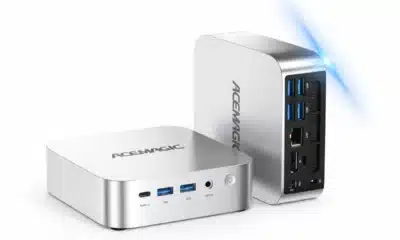
– Processing Unit: Opt for a mini PC or Raspberry Pi, or even configure a custom-built system with sufficient processing power to handle your storage tasks.
– Storage Drives: Determine whether to use high-capacity HDDs or faster SSDs. Utilizing RAID configurations like RAID 1, RAID 5, or RAID Z1 can offer additional protection against data loss.
– Future Expansion: Consider options such as Direct Attached Storage (DAS) or Network Attached Storage (NAS) devices to easily increase your storage capacity down the line.
Make sure your selected hardware is compatible with your chosen software for optimal performance.
Setting Up Software
The software you implement is crucial for managing the functionality and accessibility of your system. One popular choice is TrueNAS, known for its reliability. Here’s how to get started:
1. Install TrueNAS: Download the software, create a bootable USB drive, and install it on your hardware.
2. Configure Storage Pools: Organize your drives into pools to enhance performance and redundancy.
3. Create Shared Folders: Use protocols like SMB for file sharing across your home network, allowing simultaneous access from multiple devices.
TrueNAS also supports various applications, allowing you to expand its functionalities for media streaming, file synchronization, and more.
Implementing Backup Solutions
Data safety is paramount, and here’s how to integrate a robust backup system:
– Windows Users: Leverage the built-in Windows Backup tool to save files directly to your shared network.
– macOS Users: Utilize Time Machine for seamless backups to your cloud storage.
– Mobile Devices: Implement apps like Immich to ensure your mobile photos and videos are also automatically backed up.
Building a layered backup strategy is essential for comprehensive data protection across all devices.
Configuring Secure Remote Access
To ensure secure access to your cloud storage, follow these configuration guidelines:
– Reverse Proxy: Employ Nginx Proxy Manager for reliable external connections to route traffic safely.
– Custom Domain and SSL: Acquire a custom domain and SSL certificates from trusted providers to secure your connections.
– Port Forwarding: Adjust your router settings to allow secure external access without exposing sensitive systems directly to the internet.
– VPN Use: Enhance your security by using a VPN, ensuring encrypted communication when accessing your cloud remotely.
These measures guaranteed not only secure data access but also peace of mind when using your cloud storage.
Prioritizing Security
When self-hosting your cloud storage, safeguarding data should be a top priority. Implementing these practices can bolster your security significantly:
1. Strong Passwords: Use complex passwords for accounts and devices to reduce unauthorized access risks.
2. Two-Factor Authentication (2FA): Enable 2FA wherever possible to add another layer of security.
3. Regular Updates: Keep your software and firmware up to date to protect against emerging vulnerabilities.
4. System Monitoring: Regularly review system logs and performance metrics to catch potential issues early.
By actively managing your security protocols, you can effectively minimize risks associated with data storage.
Evaluating Costs and Scalability
While the initial investment in hardware and setup may appear steep, the long-term benefits of a DIY storage system are substantial:
– No Recurring Expenses: You avoid monthly or annual fees, ensuring you save on costs over time.
– Scalability: Your system can grow as your storage needs evolve, thanks to the possibility of adding new drives or upgrading existing hardware.
– Enhanced Functionality: The integration of tools like Nextcloud or File Browser allows for additional features such as document editing, synchronization, and calendar sharing.
With a flexible and adaptable DIY personal cloud storage solution, you can tailor the system to fit your needs while enjoying long-term savings.
In conclusion, building your own cloud storage system presents a unique opportunity to gain control over your data while enhancing security and reducing costs. By following the steps outlined in this guide, you can create a fully functional personal cloud tailored to your specific requirements, giving you complete peace of mind in the digital age.
Image Source: Unsplash