






Hardware
Simplify Your Digital Life With These Essential Tips

Building a home server can feel like an intimidating challenge, but with the right guidance and tools at your disposal, you can craft a powerful setup tailored precisely to your needs. Think of it like embarking on a DIY project where you’re not just assembling hardware, but creating an efficient, reliable system that can handle everything from media transcoding to file sharing and virtualization. In this guide, we’ll walk you through the complete process of setting up a home server using Proxmox, ZFS storage pools, containers, and network shares, so you can build a system that can grow and adapt to your future needs.
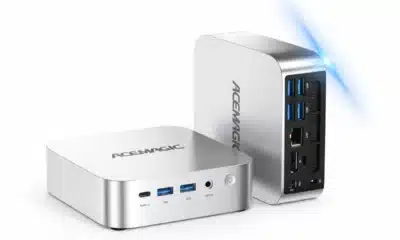
Choosing the Right Hardware
The bedrock of any solid server setup begins with selecting the right hardware. It’s crucial to choose components that not only meet your current requirements but also allow for future scalability. Here are some key factors to consider:
- Processor: A minimum 4-core CPU is a good starting point, but if you’re venturing into media transcoding, consider going for an AMD Ryzen 3000 series or an Intel CPU equipped with Quick Sync technology. These options will give you that extra edge in performance.
- Boot Drive: Invest in an NVMe SSD with at least 512GB. This will ensure your system boots quickly and your applications run smoothly.
- Storage: For your bulk storage needs, think about using mirrored HDDs or a RAID-Z configuration. This not only grants you plenty of space but also adds a much-needed layer of redundancy to protect your data.
- Virtualization Support: Make sure your hardware supports virtualization and has ample resources, like RAM and CPU cores, ready to handle the workloads you plan to throw at it.
If you’re considering breathing new life into old hardware, just be sure it meets these criteria to avoid frustrating lags or limitations down the road.
Installing and Configuring Proxmox
Proxmox is a top-notch, open-source virtualization platform that forms the backbone of your server. Getting it installed and configured properly is crucial, so let’s walk through those steps together:
1. Download the Proxmox ISO from the official website: Create a bootable USB drive using tools like Rufus for Windows, Balena Etcher for Mac, or the GNOME Disk Utility for Linux.
2. Access BIOS or UEFI Settings: Restart your system, dive into the BIOS, disable secure boot, and ensure virtualization features such as Intel VT-x or AMD-V are enabled.
3. Boot from the USB Drive: Follow the graphical installer to set up Proxmox. You’ll need to configure your time zone, root password, and network settings during this step.
Once you’ve installed Proxmox, you’ll discover a user-friendly web interface where you can manage your server. This is your command center for creating and managing virtual machines (VMs), containers, and storage configurations.
Post-Installation Optimization
Now that you’ve got Proxmox up and running, optimizing the system is the next essential step. This ensures it performs efficiently and is primed for advanced configurations:
- Repositories: Disable the enterprise repositories to access updates without a license, enabling non-subscription repositories.
- System Updates: Run updates right away to apply the latest patches, fortifying your system’s stability and security.
- Storage Partition: Resize the local storage partition to maximize the available space, making room for your VMs and containers to breathe.
- Hardware Passthrough: If you envision integrating GPUs or adding drives, enable IOMMU in both BIOS and Proxmox settings to allow for hardware passthrough.
These optimizations will prepare your server for whatever you might want to throw at it in the future.
Configuring ZFS Storage Pools
ZFS is like the backbone of your data storage, offering reliability through features like redundancy, snapshots, and data integrity. Setting up ZFS storage pools is a pivotal step in creating a sturdy server. Here’s how to customize your setup for maximum impact:
Creating a Flash Pool: Consider using mirrored NVMe drives to host your VMs and containers. The speed here is incredible and crucial for critical workloads.
Setting Up a Tank Pool: For your bulk storage needs—like media files or backups—setting it up with RAID-Z ensures redundancy, giving you peace of mind against potential data loss due to drive failure.
Understanding the intricacies of RAID levels is vital as RAID-Z enhances data protection but will also reduce usable storage space. Plan your storage carefully based on your priorities—whether that’s speed, capacity, or fault tolerance.
Deploying and Managing Containers
Containers might just be the underrated heroes of your server setup. They offer flexibility and resource efficiency that traditional VMs sometimes can’t, making them indispensable for hosting applications such as web servers or databases.
- Download Container Templates: Access the Proxmox interface and grab templates like Ubuntu 22.04 or Debian.
- Assign Storage Mount Points: Efficient data management is key; make sure you set up storage mount points for your container data directories or Docker volumes.
- Configure User Accounts: Security is important, so establish user accounts with appropriate permissions to manage access to container storage.
Setting Up Network Shares with Samba
Samba is the perfect ally for sharing files across your network, granting seamless access whether you’re on Windows, macOS, or Linux devices. Here’s how to get Samba up and running:
1. Install Samba: Begin by installing Samba on your Proxmox server and configure it to share specific directories.
2. Set Up User Authentication: Control access to your shared folders with a user authentication system to keep your data secure.
3. Implement IP-Based Restrictions: Limit access to trusted devices on your network to assure further security.
4. Enable Network Discovery: Make those shared folders easily accessible to other devices.
After configuring Samba, put your installation to the test by transferring some files and making sure everything works smoothly.
Testing and Validating Your Server
Before you dive into daily use, it’s crucial to test your server setup to ensure everything runs as intended. After all, no one wants unexpected surprises later on:
- Verify Storage Mount Points: Ensure that all your storage mount points are accessible within containers and that permissions are correct.
- Access Network Shares: Test accessing network shares from different devices to confirm seamless connectivity.
- File Transfers: Take the time to evaluate file transfer speeds and overall performance.
Proper testing and validation not only give you peace of mind but also safeguard you against potential issues that might crop up mid-task.
If you’re eager for more detailed instructions or advanced configurations, don’t hesitate to dive into the accompanying GitHub repository. It’s stuffed with comprehensive documentation, up-to-date resources, and contributions from others in the community. Your thoughts and feedback are always welcome to enhance the guide and close any gaps you spot.
Building a home server is not just a project—it’s an investment in your personal tech ecosystem. With patience and a bit of effort, you’ll create something that not only serves your current needs but adapts to an ever-changing digital landscape ahead. Happy building!